Contents
Kubernetes is a highly modular container platform open sourced by Google. Google modeled Kubernetes after Borg , the container platform that has powered Google services for over 10 years. My current company, Workiva , now uses Kubernetes to run thousands of microservices on AWS. This blog post will walk through how anyone can run a powerful Kubernetes cluster out of their home.
The Dream
Workiva evaluated using Kubernetes to power its infrastructure platform in 2017. The team decided against adopting it right away, but the project sparked my interest Kubernetes. Programming projects have always been a way for me to learn new concepts and sharpen my programming skills. In the past I didn’t always share these projects with the world. Hosting web apps can be expensive and complicated to manage. Figuring out hosting didn’t feel worth the effort for a toy problem. After learning more about Kubernetes, I was inspired to build a cluster which could host my programming projects and other fun software.
Hardware
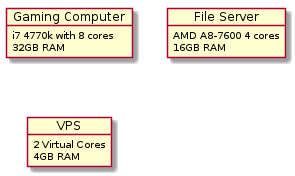
I consider myself a computer enthusiast, and I used to be an avid gamer. From my past gaming, I have old computer hardware laying around. One of Kubernetes’ design goals it to make it easy to run many web applications on cheap consumer hardware. This paradigm fit well with my ragtag group of desktops. One of my machines has a i7 Ivy Bridge CPU (8 cores) and 32 GB of ram and the other has an AMD A8-7600 (4 cores) and 16GB of ram. Once I installed Ubuntu on the two computers I had the beginnings of a Kubernetes cluster. What I lacked was a static IP for incoming traffic. I wanted to point my domains at a more stable network connection than whatever apartment I happened to live in. After surveying a couple of hosting providers, I settled on a 2 core 4GB of ram VPS from Vultr which costs me 20 dollars a month. 16 cpu cores, and 52 GB of ram split across three nodes would be plenty of hardware to run a modest Kubernetes cluster.
%%{init: {'theme': 'base', 'themeVariables': {
  'primaryColor': '#1E293B', 'primaryTextColor': '#F1F5F9',
  'primaryBorderColor': '#334155', 'lineColor': '#64748B',
  'clusterBkg': '#0F172A', 'clusterBorder': '#334155',
  'fontFamily': 'ui-sans-serif, system-ui', 'fontSize': '14px'
}}}%%
flowchart TB
  classDef vps  fill:#7C3AED,stroke:#5B21B6,color:#fff
  classDef node fill:#1E40AF,stroke:#3B82F6,color:#fff

  Internet((Internet)) --> VPS

  subgraph VPS["VPS — Vultr Gateway (2 core / 4 GB)"]
    direction LR
    NG[nginx ingress]:::vps
    TV[tinc peer]:::vps
  end

  subgraph HOME["Home Network — Tinc Mesh VPN"]
    direction LR
    N1["node1\ni7 Ivy Bridge\n8 core / 32 GB"]:::node
    N2["node2\nAMD A8-7600\n4 core / 16 GB"]:::node
  end

  TV <-->|"encrypted mesh"| N1
  TV <-->|"encrypted mesh"| N2
  N1 <-->|"Ceph replication"| N2
Installation - Kubespray
I’ve used Ansible to provision computers for long time. I have a github repo which contains my custom made ansible modules and playbooks for bootstrapping a dev machine. Since I was already using Ansible to provision other machines, it made sense to provision my Kubernetes cluster the same way. Kubespray is a project which automates creating Kubernetes clusters using Ansible scripts. It handles creating your master and worker nodes. In addtion it can install 3rd party nicities such as nginx for ingress and certificate provider. Since I had 3 nodes, I couldn’t follow the best practice of separating my worker nodes from masters. I ended up designating all three nodes as masters and letting workloads run on the worker nodes in my apartment.
Networking
Kubernetes master nodes need to communicate directly to each other; You should not expose them to the internet directly either. To facilitate this communication, I decided to run a Mesh network between my nodes which would allow them direct private communication. An added benefit to this network is that I can connect to my nodes from my laptop from anywhere. I used the mesh network Tinc , because of its ease of configuration via Ansible and because it provided the low level networking connection I wanted. One of the downsides of Tinc is that the application is single threaded. It runs in Linux kernel Userspace meaning that it uses a lot of CPU at higher throughputs. When I started this project, Wireguard was still not a mature product. I will eventually migrate to using it. Wireguard runs as part of the linux kernel so it can be much more performant than Tinc. The Wireguard team is trying to have it included in Linux by default so it could be even easier to set up in the future.
Storage
For stateless workloads, Kubernetes doesn’t require much storage space. However, I wanted to run applications like Plex, and Home Assistant which are stateful and intended to be run on one computer. Kubernetes includes a concept called “persistant volumes” to handle cases like this. Using persistant volumes, Kubernetes containers have access to the correct files regardless of which node they are started on. During my search, I evaluated several options for implementing persistent volumes. The top contenders were Ceph , GlusterFS , and good ol' NFS . GlusterFS wouldn’t install for some reason I couldn’t understand, and NFS had some drawbacks like the lack of file locking. In the end I ended up going with Ceph.
What Ceph does and how to run a cluster could be the subject of another blog post but I’ll try to breifly explain what it is and how it works. Ceph is a distributed filesystem, It forms a cluster with many nodes and stores your data across them in a durable way. Think of it like distributed RAID . Ceph requires at least three nodes and at maximum 1GB of Ram for each TB of usable storage, so RAM is actually my limiting factor. If you ever start to run out of space, you can add nodes to the Ceph cluster and it will automatically rebalance your data across the cluster. Once Ceph is set up you can expose its storage as a raw block device like a hard disk, object storage (like AWS S3), or a Filesystem (what I needed the most). Ceph’s filesystem is accessable over the network after installing the write kernel drivers so I’d be able to directly move files to it from my laptop or any of my other devices provied that I’m connected to my mesh network.
Outside of Kubernetes, I wanted to use Ceph for storing full disk backups of my machines using Borg Backup and Borgmatic , my movie collection, all of my pictures, and anything else I could need from anywhere. There are endless usecases for large file storage so I didn’t want to be limited by my hardware. I bought 12 4TB drives as storage for the ceph cluster and went to work adding them to my nodes.
Final Product
After a few months of research, amazon packages, and a vpn misconfiguration which made my hair gray, I had a solid Kubernetes cluster fit for any enterprise. I’ve continually added more applications over time, and the cluster is able to handle my changing requirements at the drop of a hat. I deploy services to my cluster using Helm , I keep my helm charts in this repo . Building my cluster was a blast! I whole heartedly encourage you to try it too.